
Purchasing a Video Doorbell for my home gave me peace of mind, as I knew it would be one way to keep an eye (or an ear) on who was at the door when I was preoccupied with other tasks. After researching and considering numerous customer reviews, I settled on the Wyze Doorbell for its affordability and excellent customer ratings.
Now that I had decided which model to go with, it was time to get down to business: wyze video doorbell installation. Without prior knowledge or tools, I was prepared to spend the whole afternoon after work just getting the doorbell set up, causing me great stress.
However, after researching, I discovered that installing a doorbell is surprisingly simple. You’ll need a plug-in transformer and chime to set up a Wyze doorbell without an existing one. Connect the wires to the doorbell, then plug it into an outlet for power. Read on to learn more in detail about it.
Voltage Requirements for Wyze Video Doorbells
The primary consideration when installing a Wyze Video Doorbell is the voltage it requires to operate optimally. The standard Wyze Video Doorbell necessitates a voltage supply within the range of 16V–24V AC with a minimum power of ≥10VA. This requirement is essential to ensuring a stable and consistent power supply to the device.
However, Wyze also offers an alternative solution in the form of the Wyze Video Doorbell Pro. Unlike its counterpart, the Doorbell Pro operates as a battery-powered camera. This model utilizes the existing wiring and transformer primarily to recharge its battery, eliminating the need for a direct, continuous power supply. This feature offers flexibility in installation, making it suitable for various household setups
Significance of Amps in Voltage Requirements
While the voltage specifications are crucial, understanding the importance of amps is equally significant. Amps, or amperes, represent the flow rate of electric current. For the Wyze Video Doorbell, ensuring that the power supply meets the minimum amperage requirement is essential for proper functionality.
Wyze Video Doorbell Installation Process
Tools You Need
| Items | Description |
|---|---|
| Plug-in Transformer | Provides power to the doorbell system. |
| Doorbell Chime | The device that produces the ringing sound when the doorbell is pressed. |
| Drill | Used for creating holes or mounting components. |
| Phillips Screwdriver | Needed for tightening screws during installation. |
| Liquid Electrical Tape | Provides waterproofing and insulation for wire connections. |
| Electric Tape | Offers insulation for wires and connections. |
Installation Process
- In order to turn off your current mechanical doorbell, you must locate the power switch on your electrical panel and switch it off immediately. Failure to do so may result in potential dangers and risks that can be easily avoided with this simple action.
- Open the chime box and take a photo of the current wiring configuration.
- Select your wiring configuration (2, 3, or 4+ wires) via the Wyze app. Follow the on-screen instructions to bypass the current chime circuit:
- For a 2-wire configuration, connect the Wyze Doorbell to the fuse wire.
- To set up a 3-wire configuration, identify the appropriate door and connect the wires accordingly.
- For 4+ wire configuration: use trial and error to find the correct wires to connect. If you’re not comfortable, call an electrician for help.
- Confirm that you have all the components and tools needed. Tap Next in the app.
- Remove your current doorbell and disconnect the wires.
- Select your preferred doorbell positioning (perpendicular or parallel) and view (flat or angled) in the app.
- Follow the on-screen instructions to install the wall plate or wedge mount for your doorbell.
- Attach the extension wires in the package to your Wyze Doorbell to install it.
- Use a screwdriver to remove the doorbell by loosening the screws at the back.
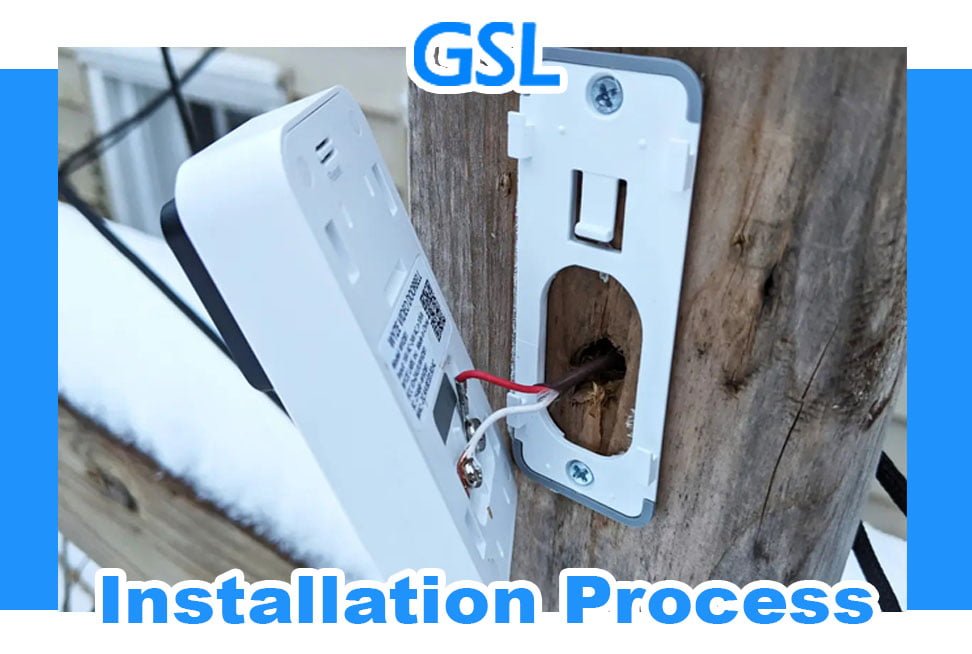
- Attach the forked part of the first wire to the first screw and the second wire to the second screw.
- Tighten the screws securely.
- For the successful installation of your Wyze Doorbell button, it is essential to connect the wires of the doorbell with those present inside the wall.
- To connect the wires, match up their ends and twist them together. Afterward, cover the connection and twist the wire caps securely.
- Tap “Show Me How” for a tutorial on using the wire caps if needed.
- Return to your electrical panel and activate the breaker for your doorbell.
- If wired correctly, the Wyze Doorbell’s status light will flash yellow.
- Secure the Wyze Doorbell onto the wall plate or wedge mount.
- Congratulations! Your Wyze Video Doorbell is now installed and ready to be set up further using the Wyze app.
You May Like
| Image | Name | Type | Dimensions | Price |
|---|---|---|---|---|
 |
Wyze Cam Floodlight with 2600 Lumen LEDs | Cam Floodlight | 9.49 x 6.97 x 7.68 inches | Check Price |
 |
Wyze Floodlight with A 32GB MicroSDHC Card Class | Cam Floodlight With a 32GB MicroSD Card | n/a | Check Price |
 |
Wyze Floodlight with 3-Month Subscription | Cam Floodlight With 3-month Subscription | n/a | Check Price |
Wyze Video Doorbell Installation With Plug-In Transformer
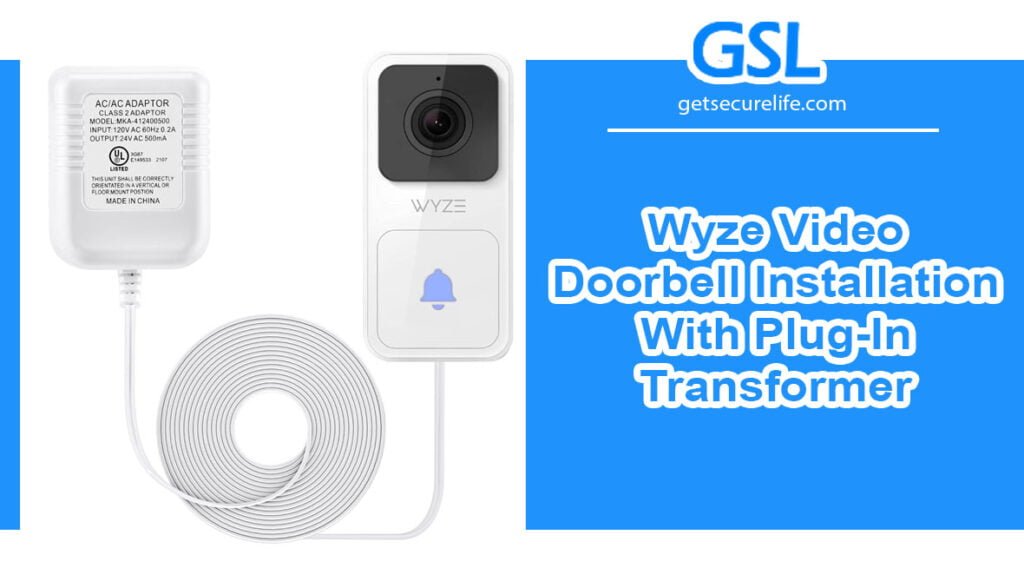
Once you’ve selected an appropriate mounting spot for your Wyze Doorbell, it’s time to prepare for installation. Ensure you have all necessary tools ready beforehand – such as a drill, screws, leveler, screwdriver, etc. Then mark the hole positions from where you’ll insert screws concerning the doorbell – make sure each screw position has been securely marked before starting work. You can find the wall mount within your Wyze packaging box, which you need to attach before your doorbell unit can be attached – follow this up.
Installing a doorbell can feel daunting, but it doesn’t have to be. The key is to be patient and follow the instructions step by step. A crucial part of the process is to drill and screw your doorbell into the wall. This will keep it secure and in place for years to come.
Drilling two holes in the wall is necessary, so make sure that you mark where you need to start before you begin drilling. Next, grab a standard screwdriver and add screws into the holes securely. Next, connect the wires by twisting them and securing them with wire caps. This way, they are secured quickly, and it’s much better than using electric tape. Securely affixing your doorbell will give your home or business an added feeling of security. It’s also important for noise reduction, which can be an issue with old doorbells that don’t fit well or cling against the wall due to vibrations from heavy knocks on your door.
Wyze Video Doorbell Installation With Transformer Adapter
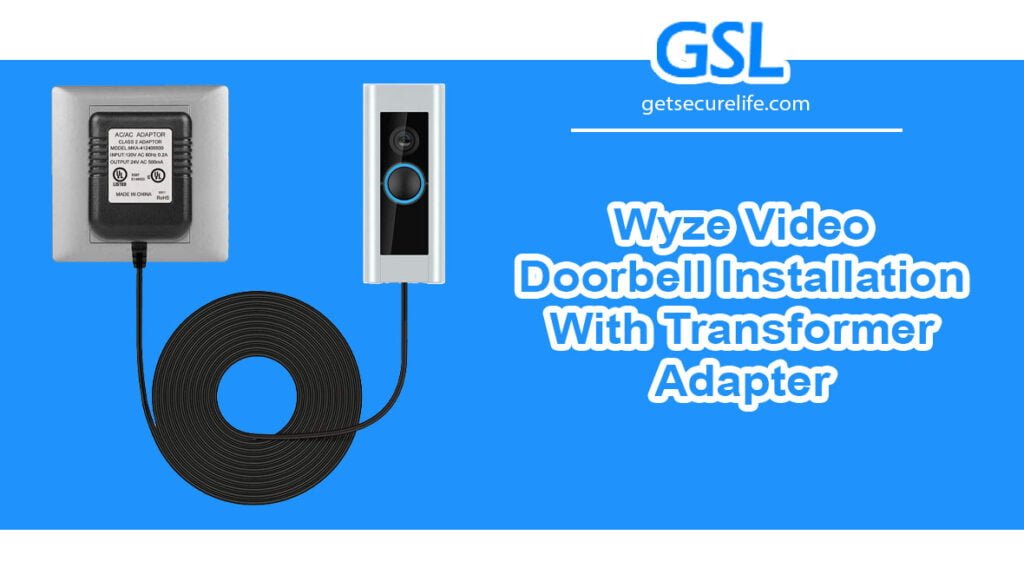
Just like the Wyze floodlight cam, you can install a Wyze doorbell with a transformer adapter too. Installing a Wyze doorbell is an ideal way to upgrade or add the convenience of a doorbell without the hassle of rewiring. The Wyze doorbell requires only an external power source, such as a transformer or wired doorbell adapter, and can be placed anywhere in the home or RV.
This allows one to enjoy convenience as well as peace of mind, knowing that they can monitor their elderly family and visitors at any time in any doorbell location. The installation is simple. Start by mounting the base plate with screws (included) to your desired location, where your existing voltage passes through the basement wall, gate post, etc., and make sure it is slightly lower than 48VAC.
Connect the wires from your transformer or wired doorbell adapter to their corresponding terminals in the back of the Wyze Door Chime; confirm that you’ve wired it correctly via black wires for positive (+) and white for negative (-). Then connect the chime’s 16-24VAC power connectors to their respective ports on your chime (which may require some force).
wyze doorbell installation without existing doorbell
Installing a Wyze doorbell without an existing doorbell requires a slightly different approach. Follow these steps to successfully install the Wyze doorbell in such a scenario:
- Gather Tools and Materials: Ensure you have all the necessary tools and materials, including the Wyze doorbell kit, a power drill, screws, anchors, a screwdriver, and the Wyze app installed on your smartphone.
- Power Source: Since you don’t have an existing doorbell, you’ll need to provide a power source for the Wyze doorbell. The Wyze doorbell kit comes with a power adapter that needs to be connected to a standard indoor electrical outlet.
- Mounting Location: Choose a suitable location near your front door to mount the Wyze doorbell. Ensure the location provides a clear view of the area you want to monitor.
- Install Power Adapter: Plug the power adapter into an indoor electrical outlet near the chosen mounting location. Make sure the outlet is within a reasonable distance from the doorbell to allow for the cable connection.
- Drill Holes: Drill holes in the mounting location to secure the Wyze doorbell. Use the provided screws and anchors to ensure a sturdy installation.
- Attach Wyze Doorbell: Attach the Wyze doorbell to the mounting location using the screws and anchors. Make sure it is securely fastened in place.
- Connect Wiring: Connect the power cable from the Wyze doorbell to the power adapter. Follow the manufacturer’s instructions to ensure proper wiring connections.
- Setup in Wyze App: Open the Wyze app on your smartphone and follow the on-screen instructions to set up the Wyze doorbell. This involves connecting it to your Wi-Fi network and configuring the settings.
- Test and Adjust: Once the setup is complete, test the doorbell to ensure it’s working properly. Adjust the camera angle and sensitivity settings as needed.
- Monitor Remotely: With the Wyze doorbell installed, you can now monitor your front door remotely through the Wyze app. Receive notifications and view live footage whenever someone approaches your door.
Installing a Wyze doorbell without an existing doorbell is feasible by providing a power source through the included power adapter. This allows you to enjoy the benefits of a smart doorbell system even if you didn’t have a traditional doorbell setup.
How is the WYZE doorbell powered?
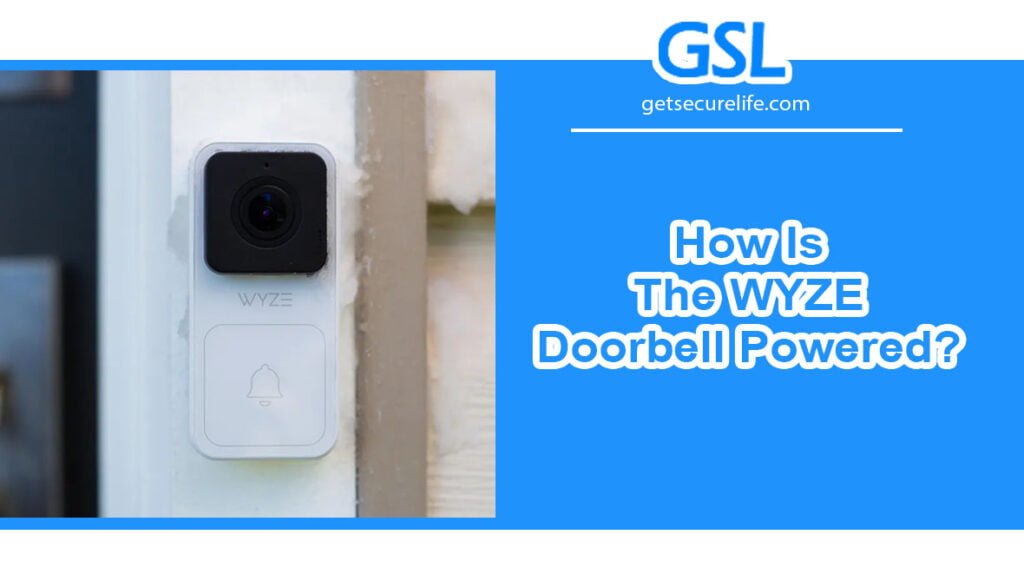
The WYZE Video Doorbell is powered through a hardwired connection to your home’s existing doorbell wiring. It requires a wired power source to operate effectively. Here’s how the WYZE doorbell is powered:
- Existing Doorbell Wiring: The WYZE Video Doorbell is designed to replace your traditional doorbell and utilize the existing doorbell wiring in your home. The doorbell wiring provides a continuous power supply to the WYZE doorbell, allowing it to function without the need for batteries.
- Wiring Connection: During installation, you’ll need to connect the WYZE doorbell to the existing doorbell wiring using the provided wires. This connection ensures that the doorbell receives the necessary power to operate its features, including video recording, motion detection, and communication through the WYZE app.
- Power Supply: The wired connection provides a reliable and consistent power source for the WYZE doorbell. This eliminates the need for frequent battery replacements and ensures that the doorbell is operational at all times.
- Transformer: The existing doorbell wiring is connected to a transformer that provides the appropriate voltage to power the doorbell. The WYZE doorbell is designed to work within the voltage range typically found in doorbell systems.
By utilizing the existing doorbell wiring and transformer, the WYZE Video Doorbell remains powered and ready to provide security and convenience features to your home, such as real-time video monitoring, notifications, and remote communication through the WYZE app.
Frequently Asked Questions
Conclusion
Wyze video doorbell installation in an easy and secure device that can help protect your home from unwanted intruders. With its simple setup process, you’ll be able to get started with monitoring your door in no time. However, if you don’t feel comfortable working with electrical wiring, it’s best to call a licensed electrician to install the video doorbell for you.