
Have you recently installed a Google Nest on your wall, only to realize it’s not the right fit for your home? Maybe you’ve found a more suitable location for it, or perhaps you’re just ready for a change. Whatever the reason may be, removing a Google Nest from the wall may seem like a daunting task. But fear not because I’m here to guide you through the process and make it as easy as possible. With a few simple steps, you’ll have your Google Nest removed from the wall quickly.
In this article, I will walk you through safely removing a Google Nest from the wall, providing step-by-step instructions and valuable tips to make the task effortless. With some patience and the right tools, you can remove your Google Nest and have it ready for a new location or storage. So, let’s get started and make it a seamless experience.
Things to Know Before You Remove Nest Product
Before removing any Nest product, it’s important to consider several key factors to ensure a smooth and safe process. Here’s what you need to know before removing a Nest product:
- Read the Manual: Familiarize yourself with the product’s user manual or installation guide. These resources often contain important information about the removal process, including specific steps, safety precautions, and any tools required.
- Power Off: Before attempting to remove any Nest product, turn off the power supply if applicable. This prevents accidental shocks or damage during removal.
- Backup and Reset: For smart devices like Nest cameras or thermostats, it’s recommended to back up any settings or data before removal. Some devices may require a factory reset before being removed from your account.
- Check for Compatibility: If you plan to replace the Nest product with a different brand or model, ensure that the new product is compatible with your existing setup. This is particularly important for devices integrated into a smart home system.
- Disconnect Any Wires: If you’re dealing with wired devices like thermostats or cameras, turn off the power and disconnect any wires according to the manufacturer’s instructions. Be cautious when handling electrical components.
- Location and Mounting: Take note of the product’s location and how it’s mounted. This will help you plan the removal process and ensure you don’t damage the surrounding area.
- Save Documentation: Keep any relevant documentation, warranty information, and receipts in case you need them for future reference or warranty claims.
- Secure Components: If you remove a product that includes various components (e.g., sensors, batteries), keep these parts organized to avoid losing anything.
By taking these precautions and considering these aspects, you’ll be better prepared to safely and effectively remove your Nest product without any hiccups.

How to Remove a Nest from a Wall?
Google Nest products haven’t disappointed us with their products to date. Their products always come with the latest features and easy-to-use technology. You can’t have a complaint about the Nest doorbell thermostat or Nest cam. However, removing them becomes a struggle once you set up your nest in one area. But, the struggle can be reduced if you can follow the right technique. That is why I want to discuss the steps in detail below:
Remove a Nest Thermostat From the Wall
Step 1: Turn off the power
It is important to turn off the power of your Nest thermostat before attempting any project that involves it, such as changing the battery. Doing so is a simple procedure that can be done in either of two ways. The first option would be to look on the side of your HVAC system and identify if there is a light switch. If one is present, turning it off will effectively kill the required power by disconnecting the wire supplying electricity to your thermostat from its live source.
This process is an important safety precaution as leaving this wire connected could result in a short circuit, potentially damaging components within the system or even creating fires. It’s best practice to err on the side of caution and always to turn off the power when working with electrical components such as those found in HVAC systems connected to your Nest thermostat.
Related Post: Does Simplisafe Work with Nest?
Step 2: Pull it off
Removing the Nest thermostat from the wall is simple and easy, requiring little effort. First, it’s important to ensure that power has been turned off at the breaker before attempting to pull it off. To begin, gently grasp the circular Nest ring and pull it outward from the wall. It should come off quite easily because it is attached with four plastic clips around its circumference.
After you have detached the Nest from the wall, you will be left with its baseplate containing electrical wiring behind. This baseplate has two screws attached to the wall, which must be unscrewed to remove it.
Step 3: Disconnect wires and unscrew the base.
Disconnecting wires and unscrewing the base plate of a Nest thermostat is easy. First, you must save your wiring diagram so there are no surprises when reattaching the wires. To disconnect each wire from the base plate, press down on the lever with your finger or a screwdriver, then pull on the wire to remove it.
It’s important to use caution when doing this, as some connectors may be brittle or difficult to release. Once all the wires have been disconnected, you can unscrew the screws attaching the base plate to the wall. Then, you can easily pull off the base plate from its mount and set it aside until replacement becomes necessary.
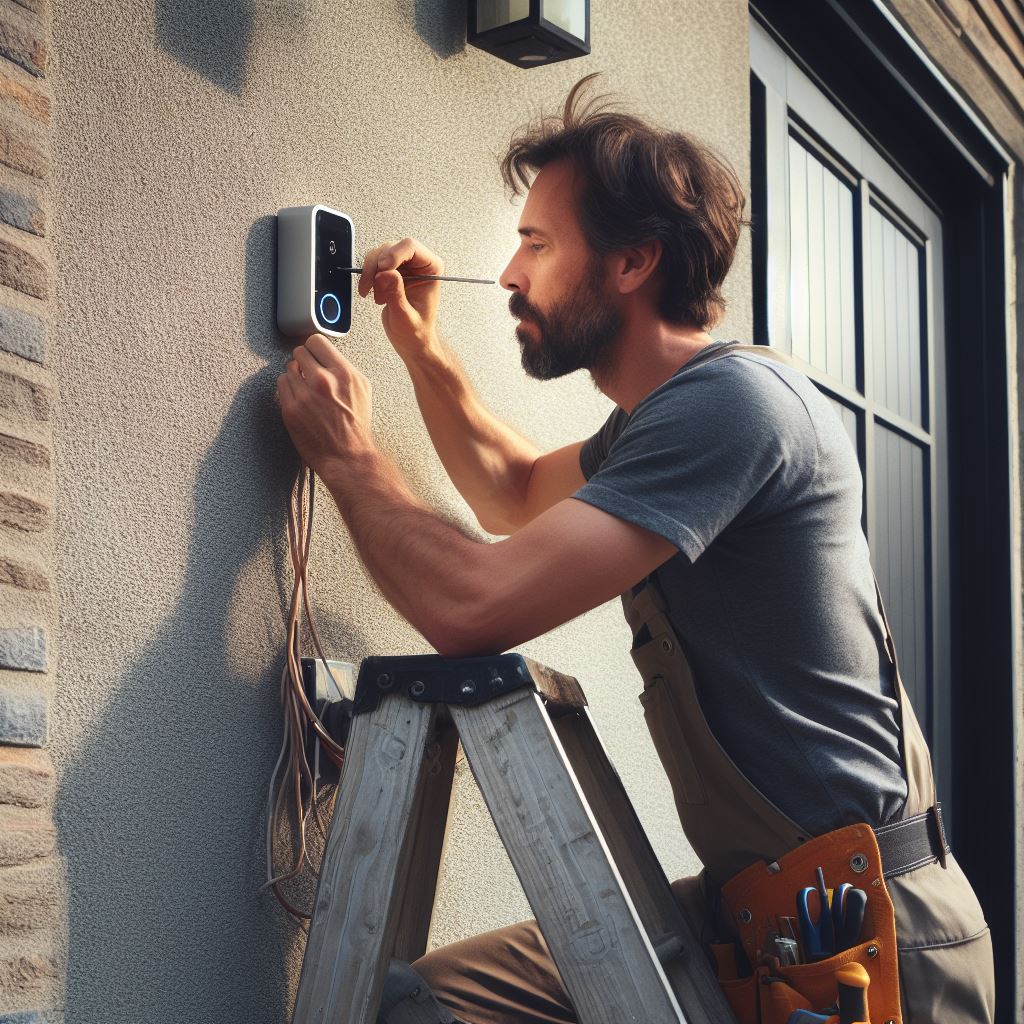
Removing the Battery-Powered Nest Doorbell:
Removing a battery-powered Nest Doorbell is simpler than its wired counterpart. Begin by locating the release tool that came with your Nest Doorbell packaging. This tool is specifically designed to detach the doorbell from its base.
If the release tool is misplaced, a flathead screwdriver can be an alternative. Gently insert the screwdriver or tool into the hole at the top of the doorbell. With the tool in place, carefully lift the doorbell upwards and away from the wall, detaching it from the mount.
Removing the Wired Nest Doorbell:
If you’re dealing with a wired Nest Doorbell and intend to remove it from its base, the provided release tool remains essential. It’s important to note that the wired doorbell’s release tool differs from the one used for the battery version. In the absence of the release tool, you can utilize a thumbtack or a paperclip as an alternative.
To proceed, insert the thumbtack-sized tool at the bottom of the doorbell and gently apply forward pressure until the doorbell audibly snaps loose from the base. Once released, grasp the bottom of the doorbell and pull it away from the wall along with its base.
Removing the Nest Cam with Battery
To detach the camera from the wall mount, firmly grasp its base and pull it away from the mounting plate. The strong magnet connecting the camera and the plate ensures easy removal. Similarly, if your camera is on a stand, hold the base of the camera stand and pull the camera away, utilizing the magnetic connection.
Removing the Nest Cam IQ Indoor:
Removing cameras placed on shelves or similar surfaces is straightforward, as the base and stand are not detachable from the camera head. If the camera is attached to a wall mount, rotate the base until it unscrews from the mount. Without a mount, you won’t be able to perform this action.
You May Also Like: Top 5 Best Emergency Battery Backup
Frequently asked questions
Conclusion
Removing a Nest from a wall requires no special tools. Depending on your Nest type, the release tool provided with the packaging or a flathead screwdriver may help facilitate removal. Additionally, when removing the Nest, ensure that power to the thermostat is turned off and handle components carefully. If you have difficulty removing your Nest device, consult your user manual for specific instructions or contact customer support for assistance.